1
Lay out the rack footprint
Lay out the footprint on the floor. Snap a down-aisle chalk line for the main aisle and cross-aisle lines for each cantilever baseline.
Service : 734-621-5052 Contact us Sales: 734-621-5052 Get A Quote
The ultimate solution for long & bulky materials—piping, lumber, tubing, steel bars and more.
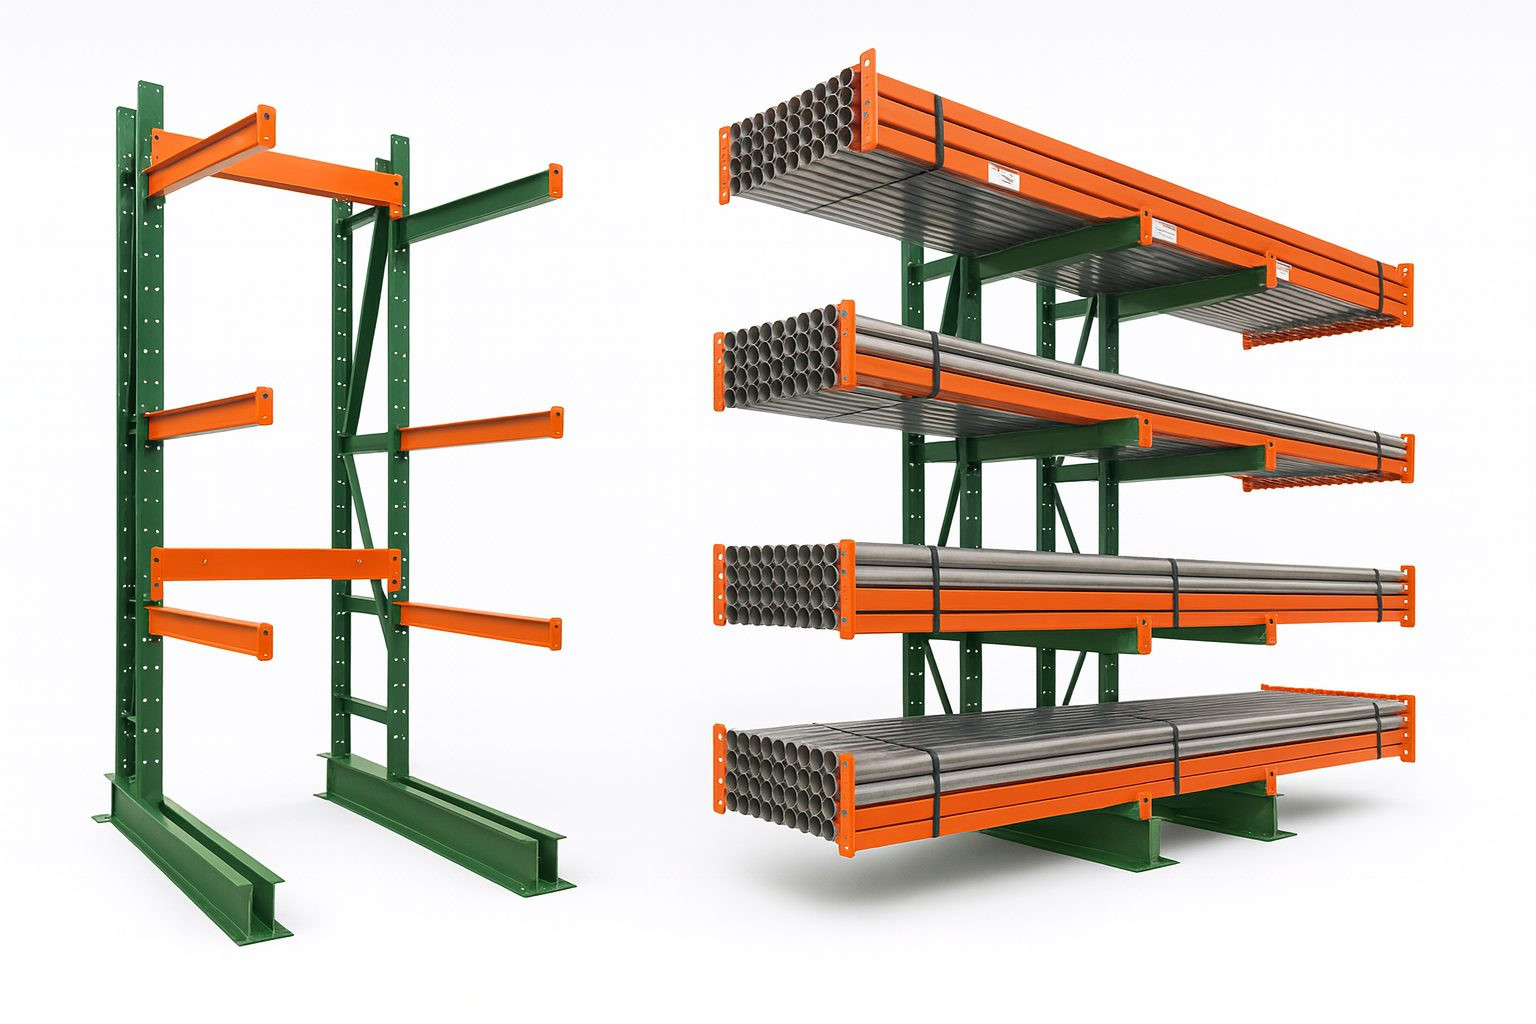
Industrial cantilever racking systems in Monroe, Michigan are a free-standing storage solution designed for long or unusually shaped materials such as piping, steel bars, tubing, and lumber. Cantilever racking differs from pallet rack or wide-span shelving because there are no vertical supports on the front edge, so loading and unloading long stock is fast and unobstructed.
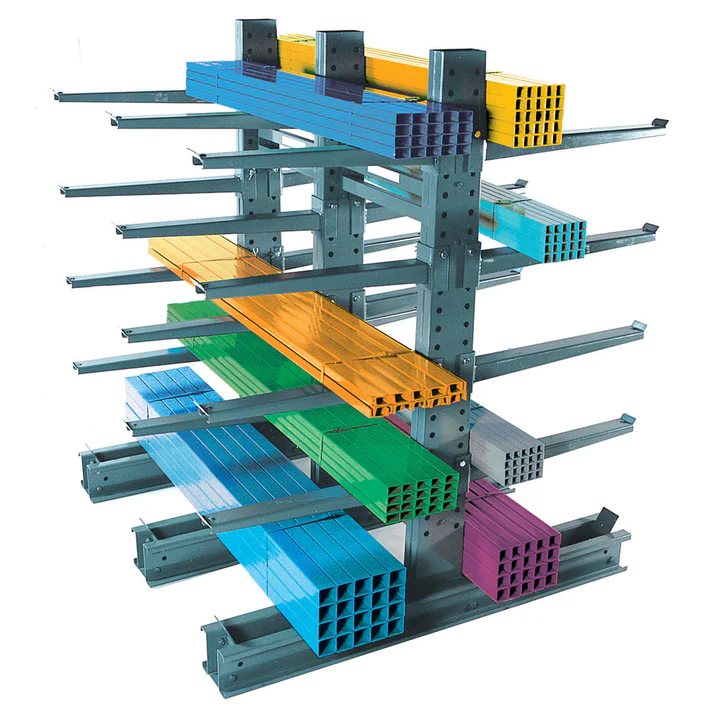
Cantilever rack components. A rack consists of three main parts: uprights, arms, and brace sets. Uprights are made of a vertical column and a horizontal base bolted to the column. At least two uprights form a single starter bay. Depending on your aisle layout, uprights can be single-sided or double-sided.
Arms are the heart of the system. Selecting the right arm style is critical to meeting your storage requirements. Straight arms store stable loads such as lumber, steel sheets, cartons, and skins. For cylindrical items that may roll—like tubing or pipe—use inclined arms or add a lip to the end of straight arms to improve retention.
Bracing for stability. Brace sets bolt between each pair of uprights within a cantilever bay to add lateral stability. For taller installations (uprights of 15 feet or higher), cross bracing is recommended to increase overall rigidity and safety.
Looking for help sizing a system? We design and ship cantilever racking for long lumber and piping in Monroe, MI and nationwide—configured for your material length, weight, and handling equipment.
Already determined the needs of your cantilever racking system and need a guide to install it? Visit our warehouse design and layout sections.
To protect your products from deflection—the “sagging” that happens between arms—use the correct number of arms in each bay. Too few arms reduce support, increase stress on each arm, and can lead to premature damage of the rack.
A simple test helps determine how many arms you need:
Brace sets commonly come in 1-foot width increments—hence the 2-foot test spacing. Never space arms farther apart than ½ the length of the material stored. For example, with 8-ft products, arms should be spaced no more than 4 ft apart.
It’s normal for product to overhang the outside of the arms. However, recommended overhang should not exceed ½ the upright-to-upright centerline distance. For example, if two arms are 2 ft apart, plan for no more than 1 ft of overhang on each end.

Cantilever rack arms are typically available as straight or inclined. Use straight arms for stable products such as lumber, steel sheets, cartons, and skids. Use inclined arms for cylindrical items like piping and tubing, which tend to roll forward. You can also add a lip at the end of each arm to help prevent materials from rolling off the front.

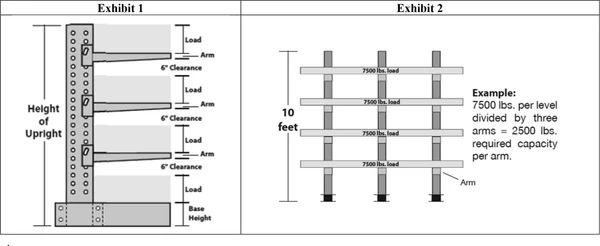
Arm length should be slightly longer than the product depth. For example, a load that’s 48" deep should rest on arms at least 48" long. Undersizing arms severely reduces their rated capacity. Refer to the diagram for the correct way to support product on cantilever arms.
Each arm carries an equal portion of the load when product is centered and evenly distributed. Choose the number of arms per level, then divide weight per level by that number to determine the minimum capacity per arm.
Upright height is governed by both the maximum storage height available and your product heights. Typical limits include ceiling height, forklift reach, sprinkler clearance, and local codes. In practice, the maximum upright height is the lesser of:


Determine your product height and the number of storage levels. Add at least 4" clearance between the top of product and the bottom of each arm for safe forklift removal.
Include arm height (typically 3"–4"). After totaling product + arm heights, add another 4"–6" above the highest level. This keeps clearances safe for busy facilities across Monroe, Michigan.
Use this simple formula once you’ve determined the required arm capacity per level:
Cantilever rack installation must be performed by qualified, trained personnel experienced in storage rack assembly. Always follow your rack manufacturer’s instructions and the concrete anchor manufacturer’s requirements for slab drilling, hole cleaning, and anchor installation. Review all diagrams and the installation manual completely before beginning.
Snap a straight reference line and mark upright centerlines at your specified brace width. Stand and loosely assemble uprights and bases, then plumb and level each frame before anchoring. Install brace sets between uprights to square the bay, torque anchors per spec, then mount arms at the planned elevations. Re-verify plumb/level after loading the first level.